So, I pre-ordered a Wii U Deluxe from Walmart, which should be arriving sometime before the end of the week. But in the meantime, I was in Toys R Us yesterday and saw a big stack of Basic systems in stock. I figured I’d go for the title of World’s Greatest Uncle, so I bought my nephew and nieces a brand new Wii U Basic. My nephew’s birthday happens to fall on Thanksgiving, and I’ll be going to my brother’s house in a few days to celebrate.
I wasn’t originally planning to be so extravagant (especially since the wedding pretty much blew away a healthy chunk of my savings), so I guess I’ll just have to start bringing healthy home cooked to work instead of eating out for lunch every day for a few months. It’s all part of the great Nutwiisystem weight loss plan.
But I figured they’re the perfect ages for a Wii U (9, 11, and 14) and it won’t be long before they’re all growed up, so I figured I should seize the day. I actually got them the Wii five years ago, and it brought a ton of joy to almost every family gathering. My nephew Michael has a penchant for jumping around wildly whenever he plays the Wii, which was one of my inspirations for starting up Nutwiisystem.com. He can beat anyone on the planet on Super Mario Kart, so it’s worked out well for him.
Anyway, the box sat here in my living room unopened for about a day when it stuck me, I really should test out the system, right? After all, I don’t want the system to be DOA when I give it to the kids, and if there’s any updating to be done, I should really do it first, right? (Okay, I really wanted to play, but we’ll keep that between us :P)
So today’s post will be all about the unboxing of the Basic (White) Set of the Wii U. When the Deluxe system comes, I’ll plan on unboxing that as well.
And so, without further adieu, the Wii U (Basic):
The Wii U Basic comes in a blue box marked “Basic Set – 8G”
The 8G stands for 8 gigabytes of built-in memory (as opposed to the Deluxe set which has 32G). At the beginning this will be plenty of memory for anyone who wants to just play games and store save data in the memory. But as you download games and downloadable content, chances are this 8G will fill up eventually. The good news is, you can easily expand the memory just by using SD cards, USB drives, or even external hard drives.
Opening the box reveals everything very nicely packed.
There’s a couple of quick start guides in Spanish, French, and English, as well as an Owners Manual you’ll never read (which is a testament to how intuitive Nintendo makes their hardware and their on-screen setup instructions). There’s also a card inviting you to join Club Nintendo. If you haven’t joined, it’s a fun little site where you can register your console and any Nintendo-produced games and earn points to buy Nintendo-branded schwag. If you earn 300 points in a year you’ll get Gold Status, while 600 points will earn you Platinum Status where you can get a crappy gift the year you earn platinum. Linking your Wii U will get you 160 points, or more than halfway to Gold. They used to extend warranties by a couple months for registering a console, but unfortunately they’ve discontinued that practice with the Wii U. I’d suggest buying the system with an American Express or Discover card to get the extended warranty benefits.
Next, of course, there are lots of wires. There are two AC adapters, one to power the Wii U console and the other to charge the GamePad controller.
There’s also a standard HDMI cable that (finally) lets you view the Wii’s improved graphics on your big 1080i HDTV.
I liked the fact that they also included an old style component cable (yPbPr) in the box, as well as a Sensor Bar. I especially like the fact that both of these are 100% compatible with the old Wii (if you like, you can keep the new Sensor Bar in the box, and just plug in the old from from your old Wii without taking it down from the TV).
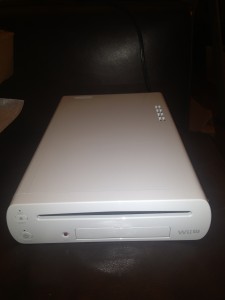
The next things to come out of the box were the things I anticipated the most. First, the Wii U console.
This looked like a sleeker, rounder, more modern version of the Wii. It’s only slightly longer and about the same thickness. On the front is a power button, an eject button, a sync button, and a door revealing two USB ports and an SD card slot. On the back are two more USB ports, as well as connections for HDMI monitor, component TV, and power.
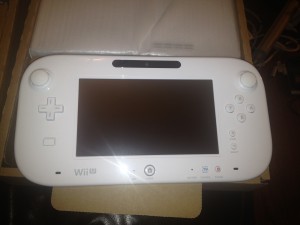
Finally, the moment I’ve been waiting for–the GamePad.
This is the part of the Wii U I wasn’t sure what to expect. Half the reports I’ve heard are people complaining how big it is. For me, it felt great. The joysticks to the left and right corners were very comfortable for my hands, as were the arrow keys and buttons. There’s a camera on top, and a microphone on bottom which has the potential to revolutionize social gaming and chat, if developers make good use out of them. Two tiny holes to the left and right produce surprising loud and clear stereo sound. There’s an orange LED that turns dark when the battery is fully charged, as well as a TV control button for using the GamePad as a remote for your TV and the Power button.
The whole unit is recharegable, and doesn’t use AA batteries, but a battery pack that’s meant to stay inside the unit all the time (until a few years later when presumably it’ll lose its charge, but by then the Wii U Plus will be out, I’m sure).
Connecting the units was a piece of cake. I plugged the console AC adapter into the wall, unplugged my old Wii Sensor Bar from my Wii and into the Wii U, and plugged the HDMI cable from the Wii to the TV. The unit powered on, with the familiar blue LED light telling me it was working.
Next, I plugged in the GamePad controller, which I found was charged.
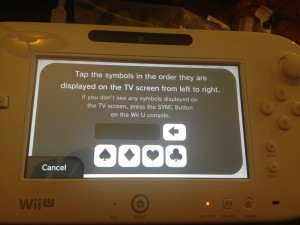
On the TV screen was a big, beautiful Wii U logo, and then a screen telling me I needed to sync the Wii U console with the GamePad. This was ridiculously simple–you just press the red “sync” button on the console (to the right of the on/off button), and then you go to your GamePad and press the red “sync” button on the back of it (to the lower left under the serial number barcode–you’ll need a paperclip or toothpick or something to press it).
Then, it’ll come time for you to play your first “game”. It’s actually a little step to make sure the sync between the console and the GamePad is complete, but they made it a little challenge where you have to match symbols you see on the TV screen by using your finger on the touchpad.
Once you successfully key in the right combination of symbols, you’re brought through the setup provcess. You then see a Nintendo logo and then the message that “Your Wii GamePad is ready. Tap the screen to set up the console. Instructions will appear on the TV screen”.
What follows is your first experience at two-screen gaming. The TV screen will provide detailed instructions, while the GamePad screen will show you options to select. I found myself ignoring the TV screen and just looking at the GamePad, which worked fine. But I think it’ll take a while for me to learn how to properly look at the TV at the right times and look at the GamePad screen at the right time.
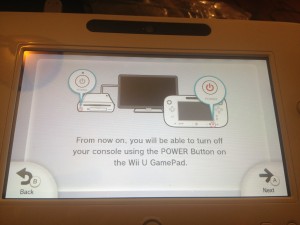
1) You first go through a series of steps where you set the display language of your GamePad (I set mine to English), select your country (I selected United States). Then, a screen showed up telling me that moving forward, I can power the console on and off by using the GamePad power button. Which is pretty cool, although the next thing I need them to invent for me is a way to get a game CD to pop out of the box and into the console without me getting off the sofa.
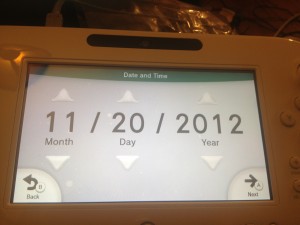
2) Next, you set the date and time. It felt a bit old-fashioned for me to have to set these manually. I wish Nintendo had put the WiFi setup first, so the system could pull the date and time from the Web.
3) In the next step, the system detects your TV resolution. 1080i on a Wii, who would have ever thought?
4) The next step lets you set up the GamePad to control your TV be using the “TV Remote Function”. At this point I felt like I didn’t want to deal with this, so I told it to skip it for later.
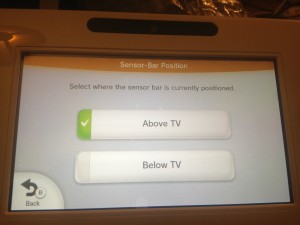
5) In the next step, just like on the original Wii you have to specify where your sensor bar is located (if you want to use your Wiimotes). I put mine above the TV.
6) The next screens are courtesy of the Nintendo lawyers. It’s health and safety information and and End-User License Agreement where you basically say you won’t sue Nintendo if you end up throwing your Wii remote out the window into traffic.
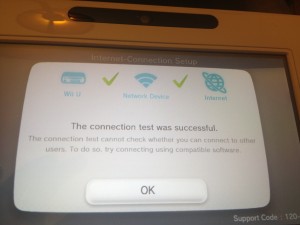
7) Next, you set up the console’s Internet connection. While there will be ways to connect an Ethernet cable through USB, most people will opt to use their WiFi network. You just choose your network, enter your WEP password, and you’re connected.
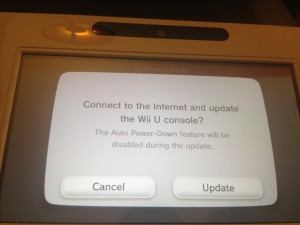
8) The next step, the Wii U will innocuously as if you want to connect to Nintendo to download updates. Sure, I thought.
Little did I suspect that the update would take a LONG time; over my WiFi connection it took almost exactly an hour to download the update and install it. At this point I was really happy that I opened the box and didn’t subject my nieces and nephew to an hour of watching a blue bar.
At long last, the update was downloaded and installed and the TV screen said “The update is complete. Check the Wii U GamePad screen.”. The GamePad screen said “the update is complete and the console will now restart”.
After the system restarted, the GamePad screen had a button that said “Add New User (for first time user). There’s another button that says “Add User From an Existing Nintendo Network ID”. I actually got a little confused at this point, as I wasn’t sure if my Club Nintendo login counted as a “Nintendo Network ID” (it doesn’t).
I chose “Add a New User”. The first thing you see on the TV screen is a message that tells you that you will create your Mii. As someone who has a Wii, I was mainly interested in seeing if I could copy my Mii from my Wii to my Wii U (say that 10 times fast).
There are two options: “Create or Receive” or “Choose a Look Alike”. “Create or Receive” lets you create your Mii from scratch (the same way it was done on the Wii), from a photo, by connecting to a Nintendo 3DS, or by scanning a QR code. I found out that this is done through what they call a System Transfer, which allows you to transfer data from a Wii console to a Wii U console. This is done from the classic Wii menu (see below).
I did try the photo feature to see if I liked the new Mii it would create for me. Here, you first choose your gender, skin tone, eye color, hair color, and hairstyle, and then take a picture of your face. While it was a little bit of a pain to go through the process of creating my Mii all over again, I have to admit that doing it using the GamePad was a load of fun. As you form the features of your Mii on the GamePad, a large version will appear on the TV screen. At the last step, you take a photo using the GamePad, and the Wii U will capture your facial features with surprising precision. You can then fine-tune the Mii to your delight–you’ll see a split screen on the TV that shows your real face and your Mii face. My photo Mii turned out to be a little too close to reality for my tastes, so I went through and recreated something similar to my original Mii fairly quickly.
![IMG_3926[1] my mii](https://gaming.fit/wp-content/uploads/2012/11/IMG_39261-300x225.jpg)
Once you Register your new Mii, you’ll be asked if you want to link it to a Nintendo Network ID, which gives you access to Miiverse (an online service where people from across the world meet up using their Mii characters), Nintendo eShop (View information and videos for all kinds of software, much of which you can purchase directly), Wii U Chat (make video calls to friends over the Internet), a Friend List (so you can see online status of friends and what games they’re playing), and online features of Wii U games where you can compete with others around the world.
If you choose Yes, you’ll need to enter a lot more information, including a Nintendo Network ID (not necessarily the same as your Mii nickname), as well as your full date of birth, email address and whether you want to receive commercial email from Nintendo. You’ll be sent a confirmation email containing a 6-digit code that you’ll need to enter.
At this point I understood what it meant in the beginning–I’m guessing that now that I have a Nintendo Network ID I can take it to any other Wii U by creating a new Mii and choosing “Add User From an Existing Nintendo Network ID”. Your Mii and your Nintendo Network ID will be linked at this point, and you’ll be able to access online features.
There are, of course, parental controls so that parents can restrict kids from using certain software, visiting Web sites, etc.
A screen appeared which said that the Wii U is set to power down automatically if left unused for 1-hour. You can change this setting in System Settings.
Another screen explained that the five colored icons on the bottom of the screen were software you can use by connecting to the Internet. It inclues the Miiverse, the eShop, an Internet Browser, the upcoming Nintendo TVii, and Notifications.
Finally, about two hours after I got started, I got to the Wii U menu, which looks like this on the GamePad. There are pre-set icons for things like NetFlix, Hulu, Amazon Online Video, and YouTube.
On the TV, it’s a rather confusing screen where you see a bunch of icons, flashing tips, and a bunch of Mii characters roaming around. I guess Nintendo is trying to drive home the fact that the Wii U is meant to connect with others.
You can insert a CD and start playing. You can also access the Wii menu. At this point you’ll be promted to pair your Wii remote with the console. To do this, you click a button that says “pair Wii remote”, and then you’ll press the “sync” button on the controller you want to pair (located in the battery compartment). It took me one shot to pair my MotionPlus controller, a much different story than my old Wii when trying to pair Wiimotes became a futile exercise in button mashing.
At this point the menu showed up on the TV screen, and the random scene of Miis went to the GamePad. You can press X to swap the menu between the TV and the GamePad.
You can select Wii menu again, and see the old style Wii menu. While I liked the GamePad, there was something nice about being able to use the Wii remote to navigate again and seeing the old familiar screen, albeit much more sparse than on my Wii. You can fill up the menus with Wii channels again from the Wii Shop Channel, or you can go back to the Wii U menu.
Note if you try to access any online features without having linked to a Nintendo Network ID, you’ll get a cryptic error message saying you can’t access that feature. To fix this, simply go back to the Wii U menu and make sure to link your account to a Nintendo Network ID.
At this point I’d been setting up the Wii U for a full three hours. Granted, the time flew by as I was getting acclimated to the Wii U. But if you get one, be prepared to spend a lot of time setting it up before you play your first game.
My first impressions are mostly positive, with a few reservations. First of all, the GamePad is going to be an amazing device. I can see myself playing Wii games on it (freeing up the TV for my wife), and I’m hoping that game developers really make great innovative use out of the second screen. I think it’s actually a bonus that the camera is built into the GamePad versus sitting all the way on the TV like the Xbox and PS3; again, good game developers will figure out very clever things to do with this. The GamePad is a pleasure to use; it’s comfortable to hold and has a beautiful bright picture. I’m hoping that when TVii comes out, it’ll also allow for watching movies from the GamePad.
As you can probably tell from the above, the setup was a bit more grueling than I’d hoped. There are some things that should have been a lot simpler than they were. I’m not exactly sure why they decided to have a separate Wii U menu than Wii menu; presumably they’re setting up the Wii U to be more than just a gaming machine (i.e., the Wii menu) and hoping that we’ll use it as our entertainment hub (i.e., the Wii U menu), but the way they’re going about it just makes it confusing. Also, I suspect a lot of people are not going to figure out how to port their old Miis from their Wiis using System Transfer and will waste a lot of time trying to recreate their beloved Miis.
Of course, the real test will be once I finally start playing games, which I hope will be soon. 🙂
![IMG_3859[1] Wii U Basic Box](https://gaming.fit/wp-content/uploads/2012/11/IMG_38591-300x225.jpg)
![IMG_3863[1] insides of wii u box](https://gaming.fit/wp-content/uploads/2012/11/IMG_38631-300x225.jpg)
![IMG_3864[1] manuals for the wii u](https://gaming.fit/wp-content/uploads/2012/11/IMG_38641-300x225.jpg)
![IMG_3866[1] ac adapters for new wii u basic](https://gaming.fit/wp-content/uploads/2012/11/IMG_38661-300x225.jpg)
![IMG_3865[1]](https://gaming.fit/wp-content/uploads/2012/11/IMG_38651-300x225.jpg)
![IMG_3933[1] wii u main menu](https://gaming.fit/wp-content/uploads/2012/11/IMG_39331-300x225.jpg)
![IMG_3934[1] pair wii remote](https://gaming.fit/wp-content/uploads/2012/11/IMG_39341-300x225.jpg)
![IMG_3935[1] menu on the TV](https://gaming.fit/wp-content/uploads/2012/11/IMG_39351-300x225.jpg)
![IMG_3936[1] wii menu](https://gaming.fit/wp-content/uploads/2012/11/IMG_39361-300x225.jpg)
1 Comment